:before と :after の疑似要素を使ってCSSでリボン風見出しを作る方法
ざっくりした解説
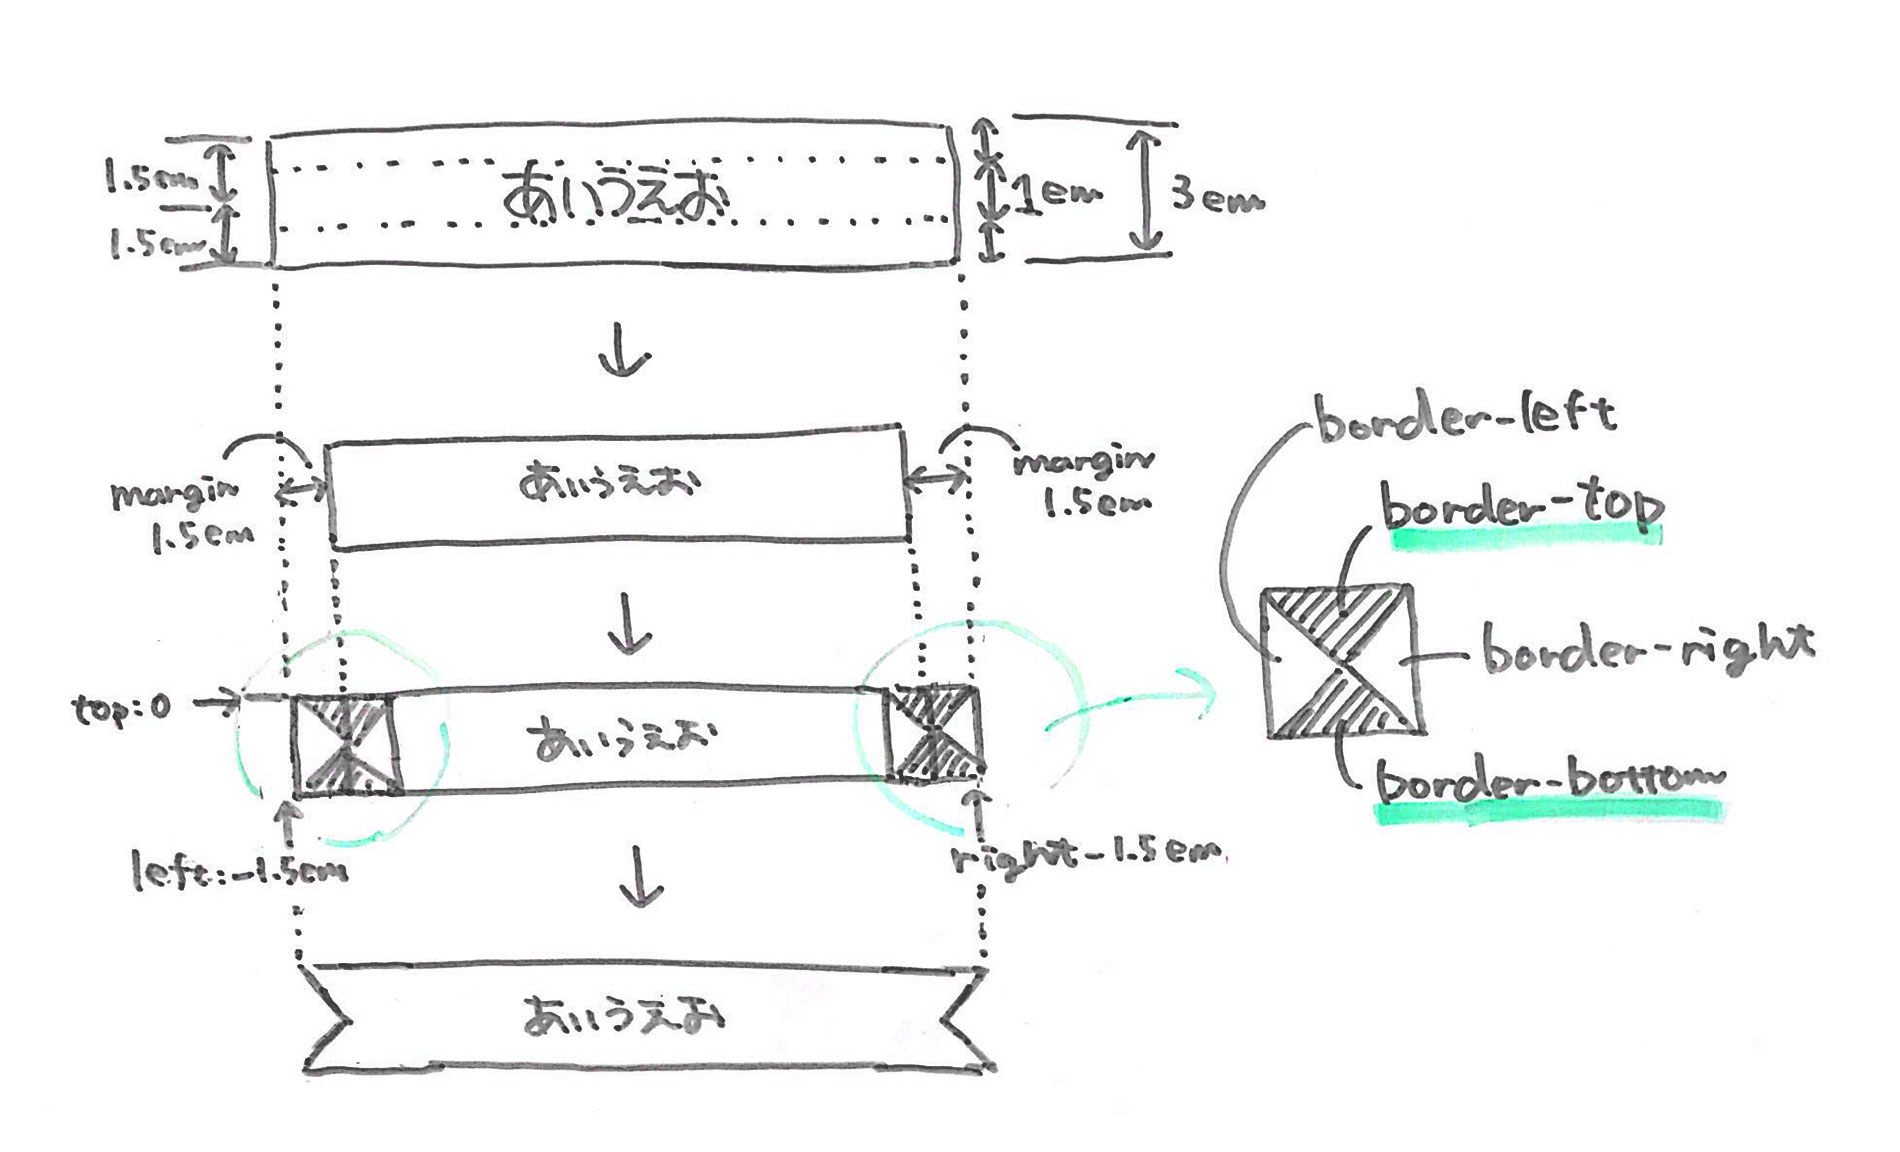
今回は h1 要素を装飾する。左右に配置する砂時計型のブロック要素は、h1 の :before と :after で作る。

手順はざっくり以下の通り。
- h1 の line-height に基準となるリボンの高さを指定 (今回は3em)
- h1 の左右の margin に、指定した高さの半分の値をセット (今回は3÷2=1.5em)
- h1:before / h1:after を、それぞれ h1 の左右 -1.5em の位置に配置
- h1 の背景色と、h1:before / h1:after の上下ボーダーの色に、同じ色を指定する
結果的に、同じ色がぜんぶ繋がって見えてリボン型になる。
h1:before / h1:after の左右ボーダーの色は、背景色と合わせてもいいが、透明(transparent)にしておけばbody等の地の色がそのまま出せる。
サンプル
https://hi3103.net/study/1904-ribon/
ソース
HTML
<h1>あいうえお</h1>CSS
※前提:デフォルトのCSS設定はイニシャライズされてプレーンな(余白等がついていない)状態。
h1{
    position: relative;
    background-color: #000;
    color: #FFF;
    line-height: 3em;
    text-align: center;
    margin-left: 1.5em;
    margin-right: 1.5em;
}
h1:after,
h1:before{
    display: block;
    content: '';
    position: absolute;
    top:0;
    border-top: 1.5em solid #000;
    border-bottom: 1.5em solid #000;
    border-right: 1.5em solid transparent;
    border-left: 1.5em solid transparent;
}
h1:after{ left: -1.5em; }
h1:before{ right: -1.5em; }